Issue Pull Request (PR) for features


      This file only relates to  GitHub.
      Click here to view the  GitLab Version
    

This will show you how to do git-flow style of committing. Ideal git guidelines is that we never commit anything to master directly. So instead, we make use of branches where we will do our code/feature/implementation/whatever and then we will issue a Pull Request (PR) to commit said code back to master. This way we are able to do extra validation on our code through code review by Continuous Integration (CI) servers or other collaborators. This will ensure that bad code will never be found on master

Note: Basically most of the features should follow this flow (everything on a branch and changes back to master through a Pull Request). This way it will allow us to do our own stuff simultaneously effectively
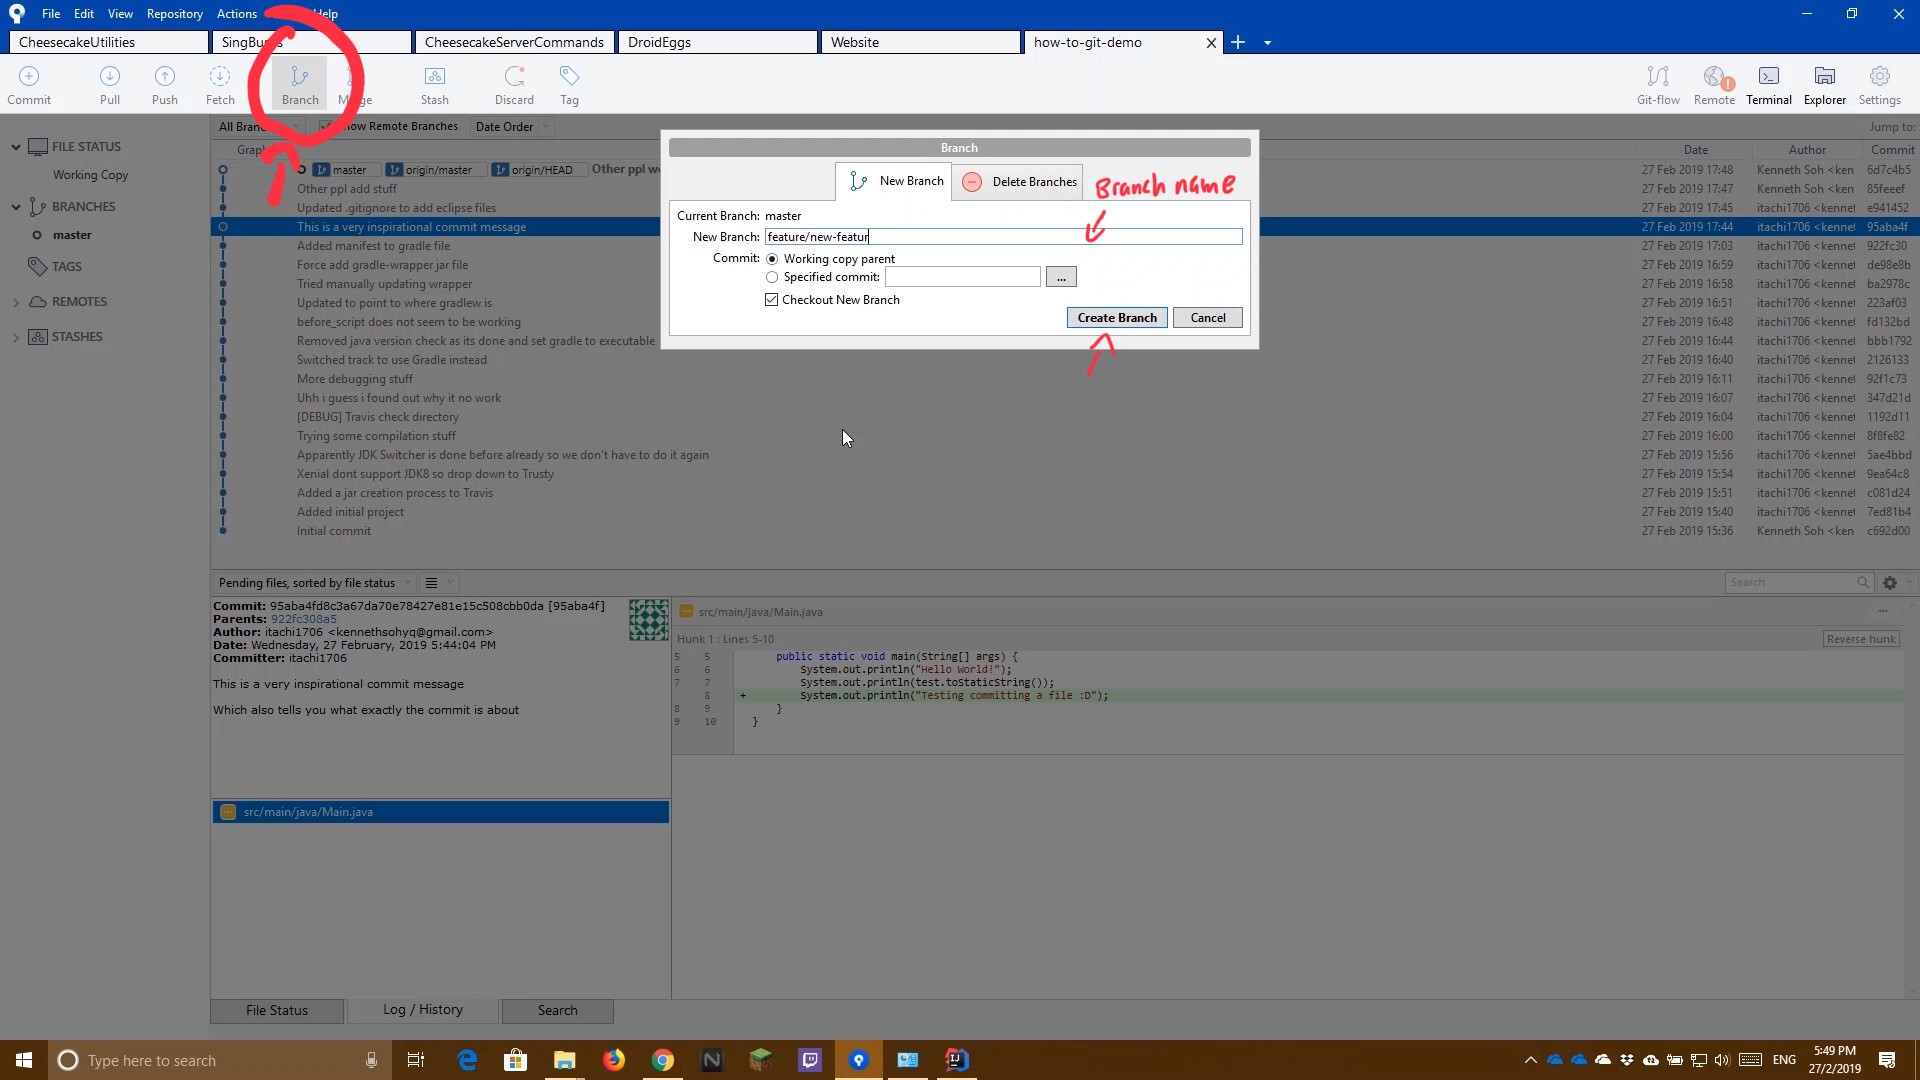
  1. Click the Branch button to create a new branch
  2. Enter your desired branch name (To sort the branch to folders, append / to the branch name)
  3. Click Create Branch to confirm branch creation
    Issue Pull Request for Feature #1
  4. Do your necessary code implementation/fixes/changes
    (See Pull from origin, Commit Code, Push to origin)
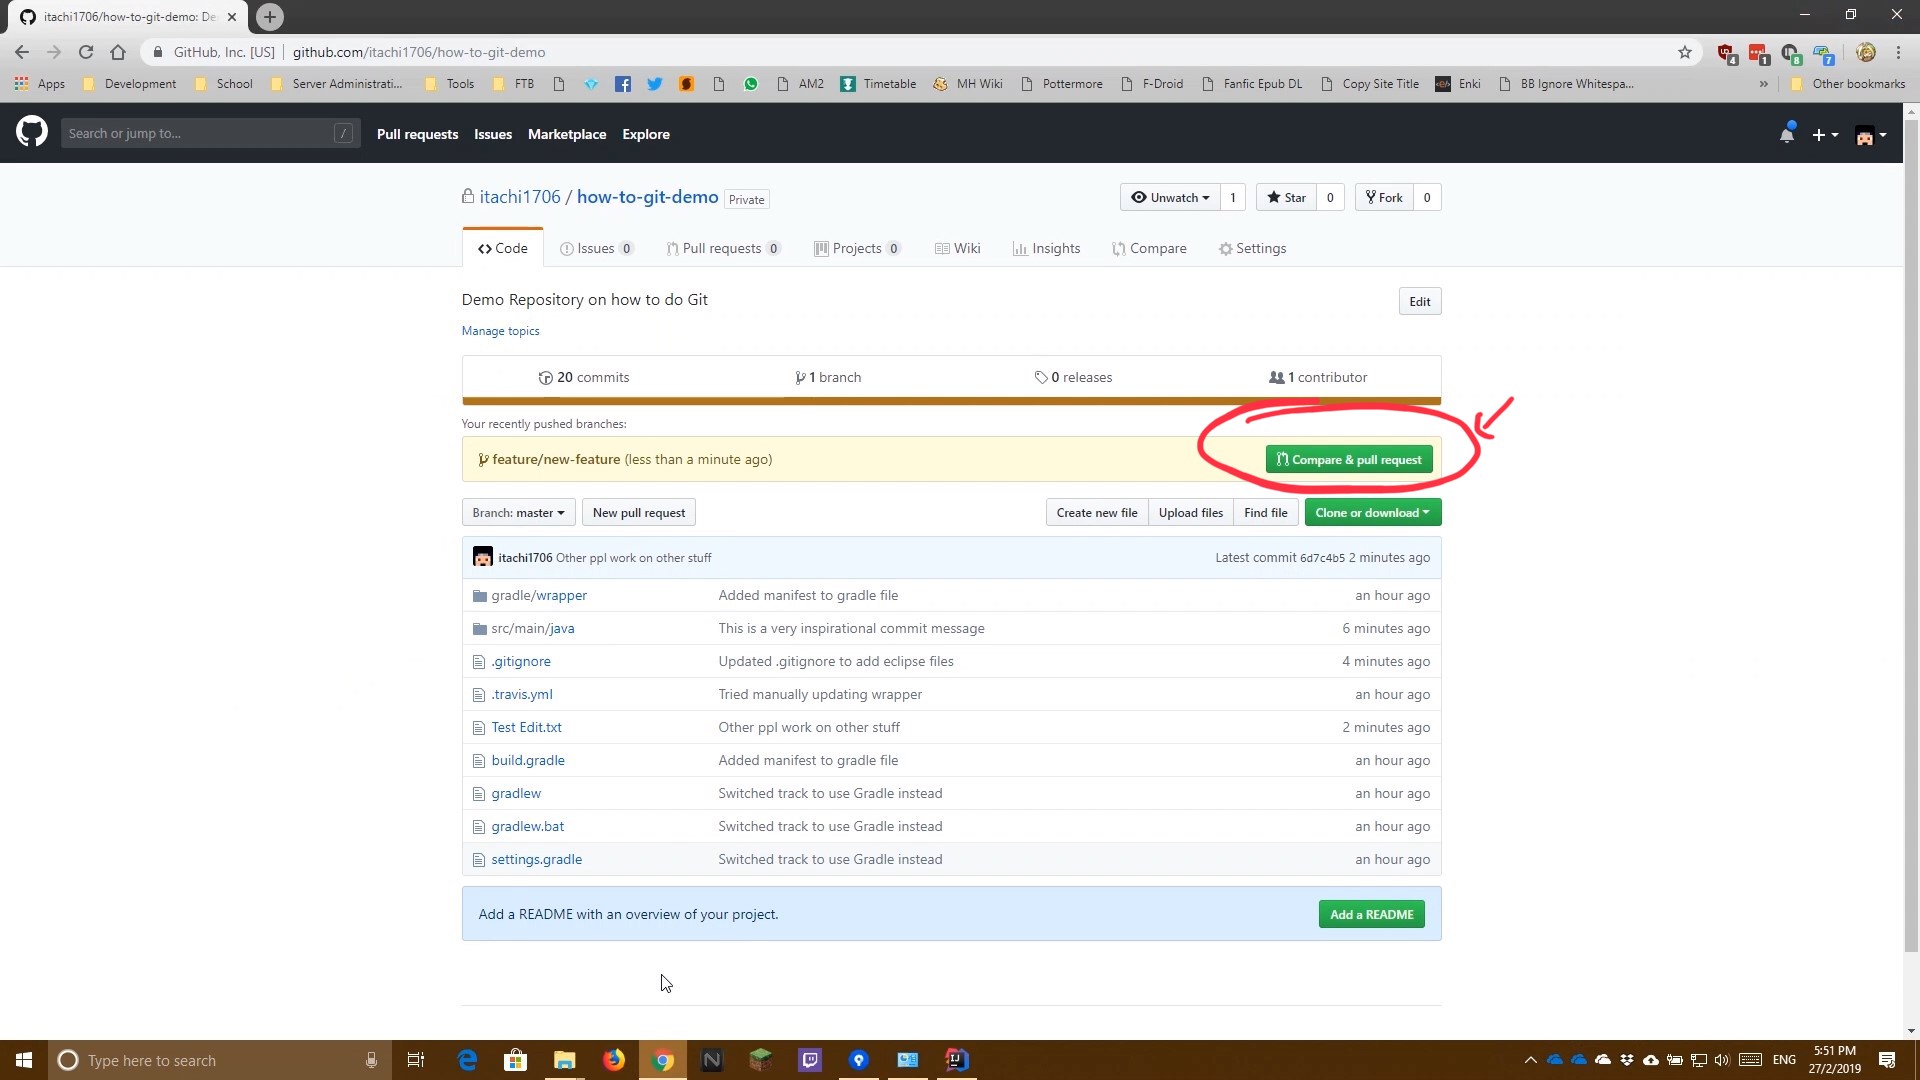
  5. When it is all done, head over to the repo page
  6. You should be able to see your branch name highlighted in yellow, find your branch and select Compare and Pull Request
    Issue Pull Request for Feature #2
  7. Note: If it does not show up, manually create the PR by going to the Pull Request tab and select "Create Pull Request", after which select your branch in the compare dropdown box
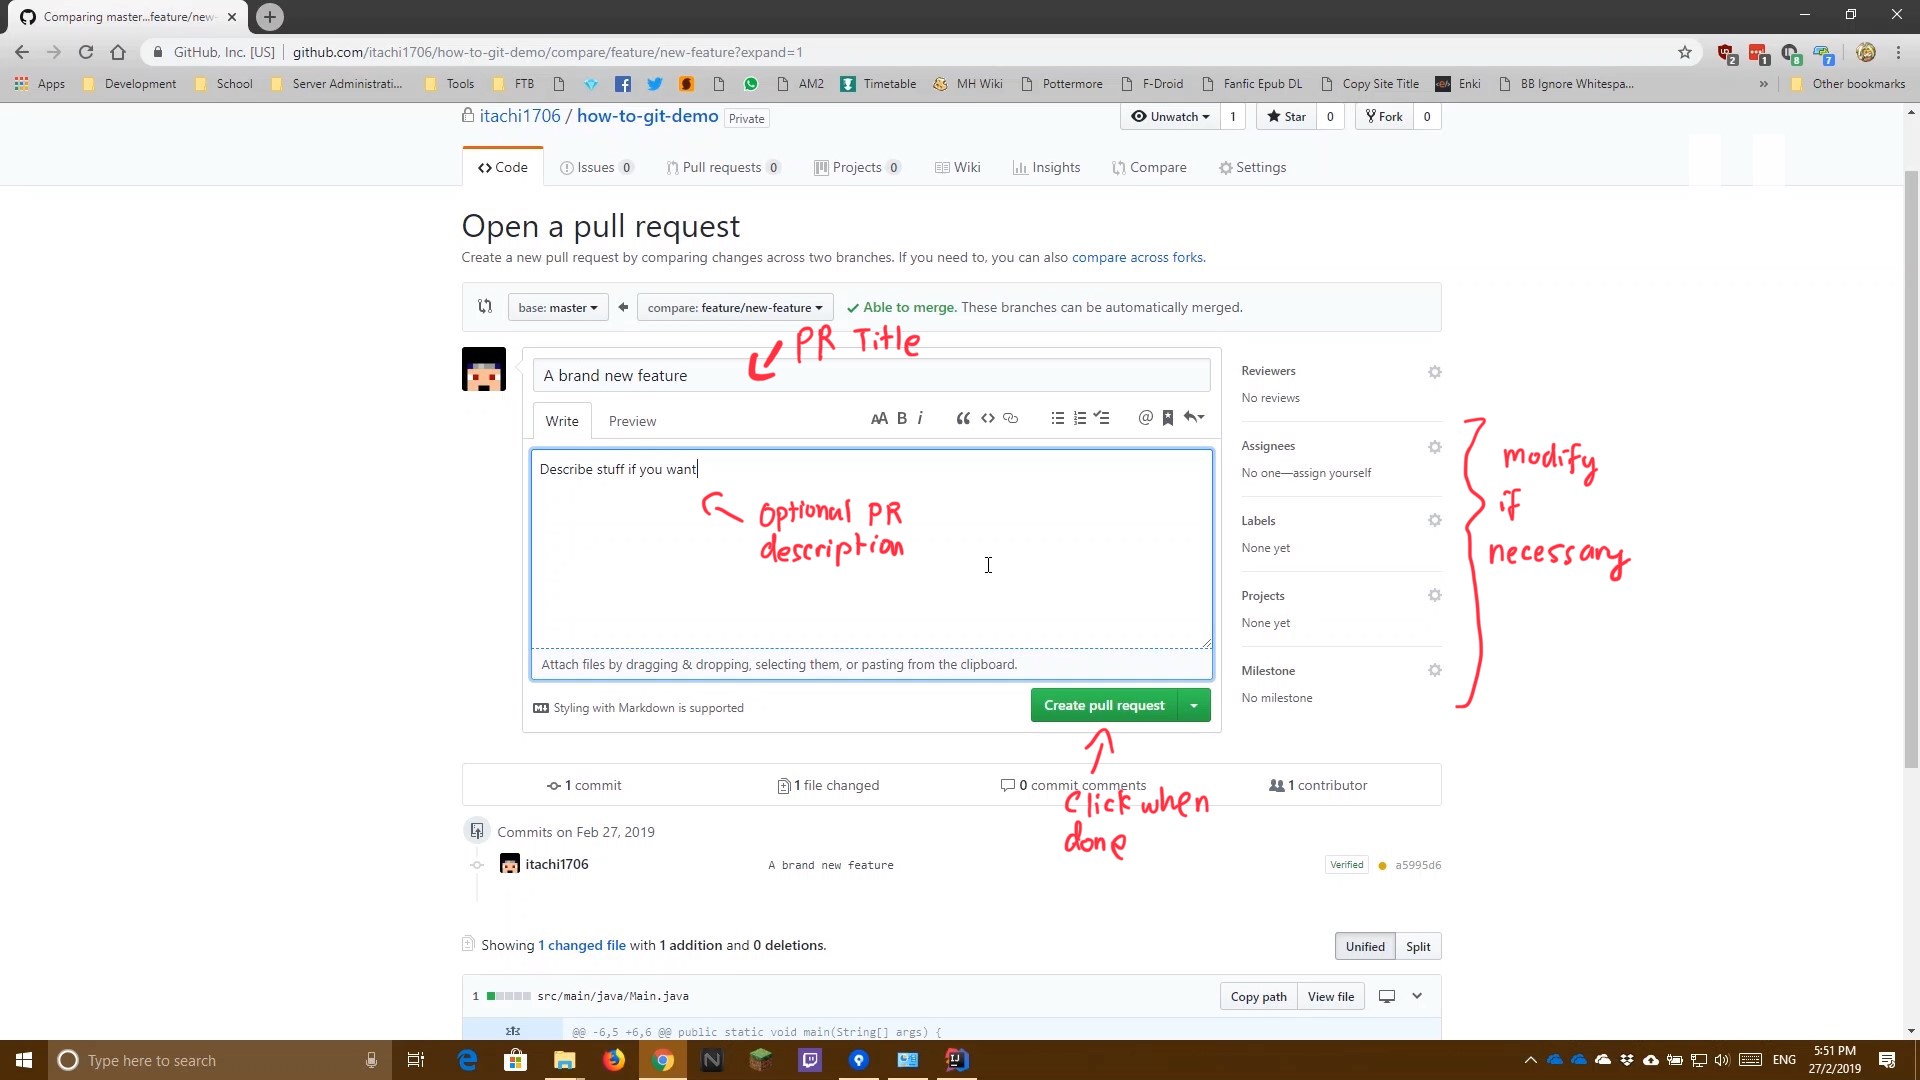
  8. Enter your Pull Request Title and Descriptions accordingly if needed. Also modify the settings on the left if you need to do so
  9. When you are done, create the PR by clicking the green Create Pull Request button
    Issue Pull Request for Feature #3
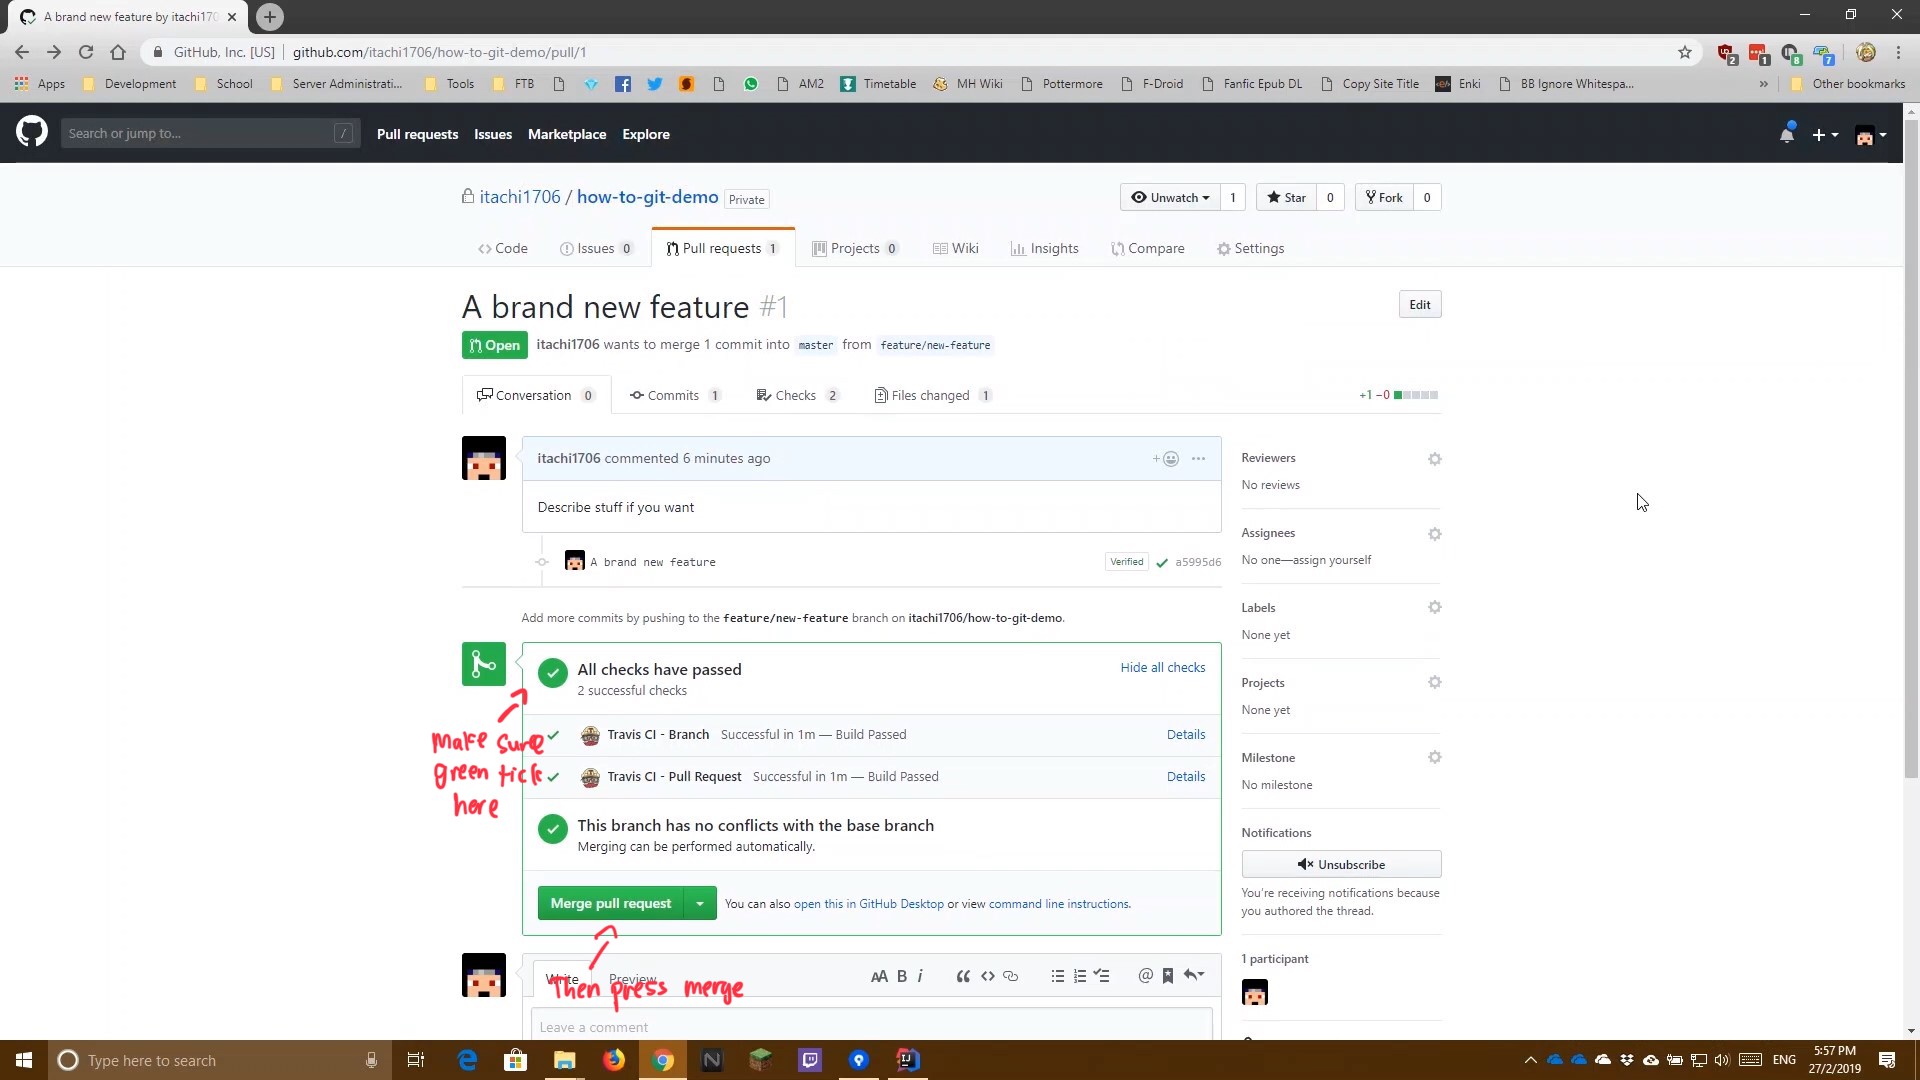
  10. Now we play the waiting game until a green tick appears and it says All checks have passed (Note: If it fails, your code is not compiling and needs to be fixed)
  11. If all checks have passed, either you or anyone else can go ahead and click the green Merge Pull Request button
    Issue Pull Request for Feature #4
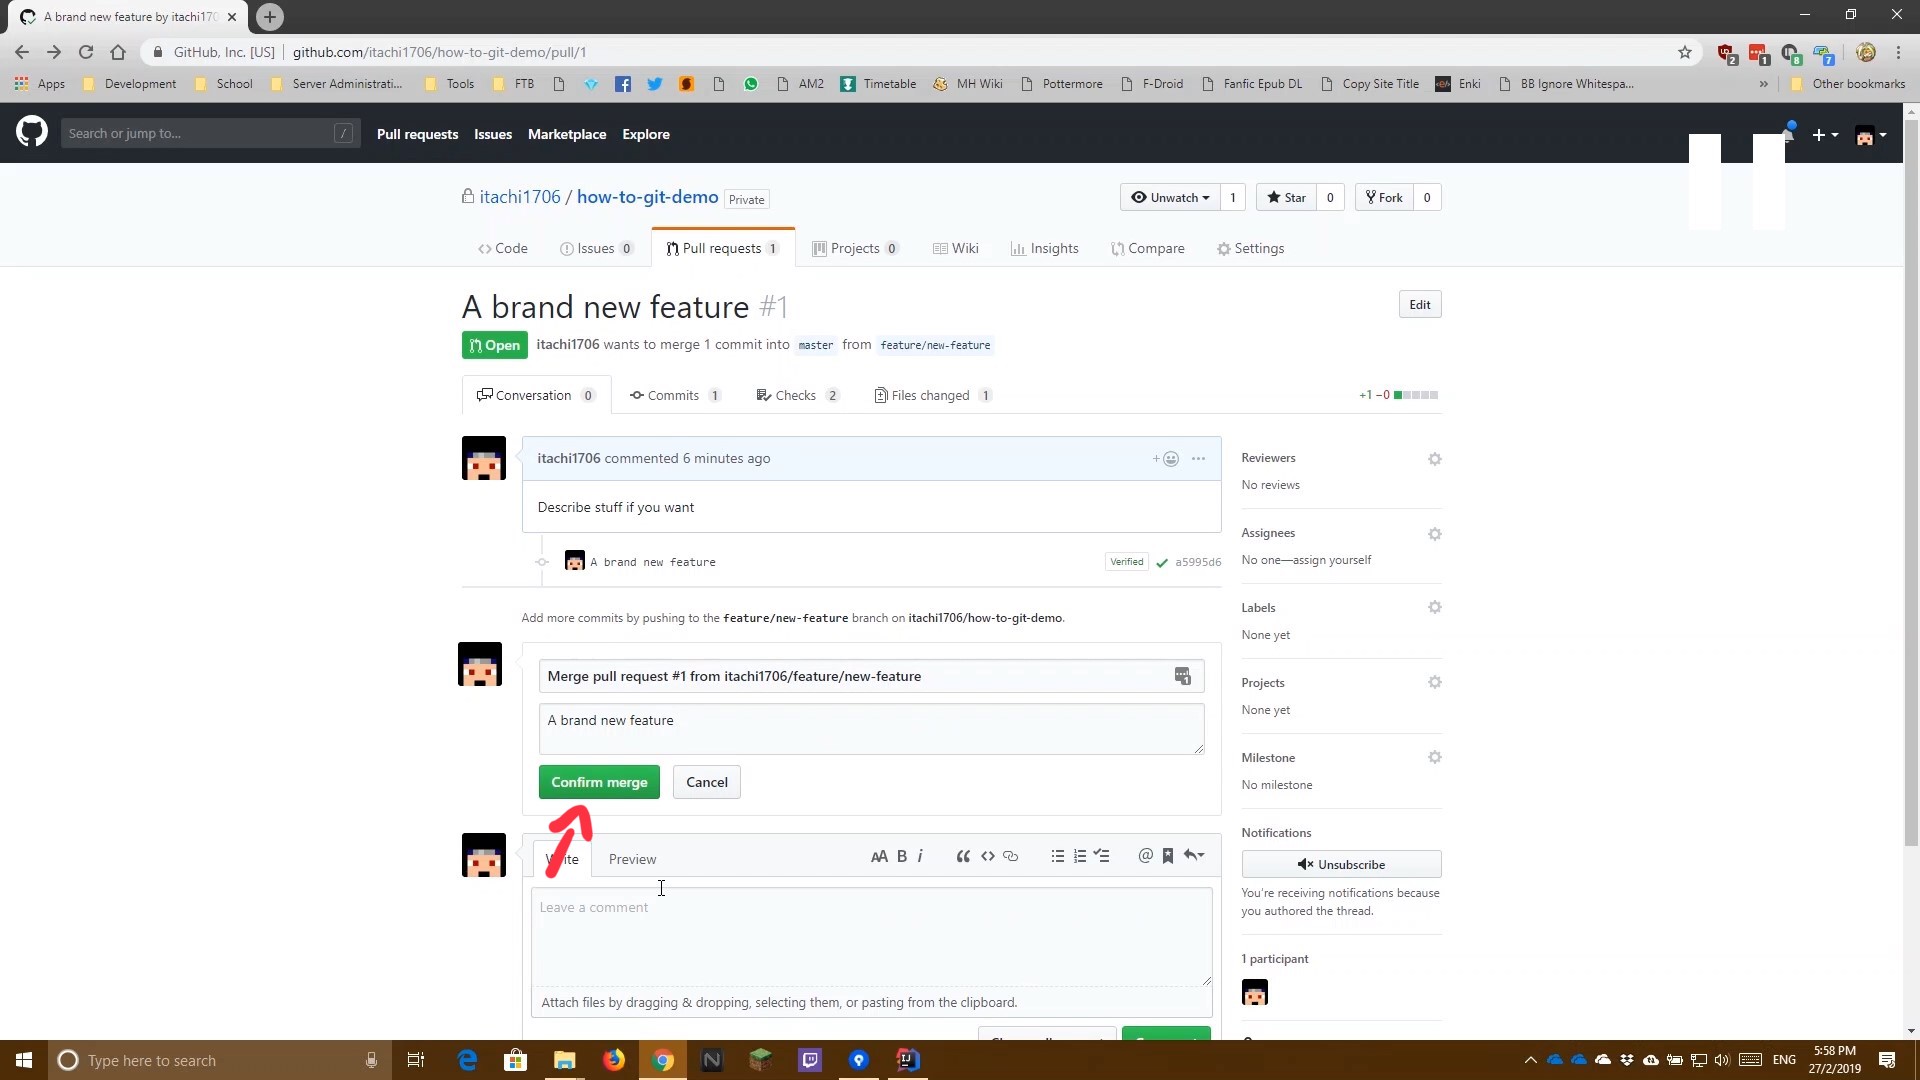
  12. Continue clicking Confirm merge here
    Issue Pull Request for Feature #5
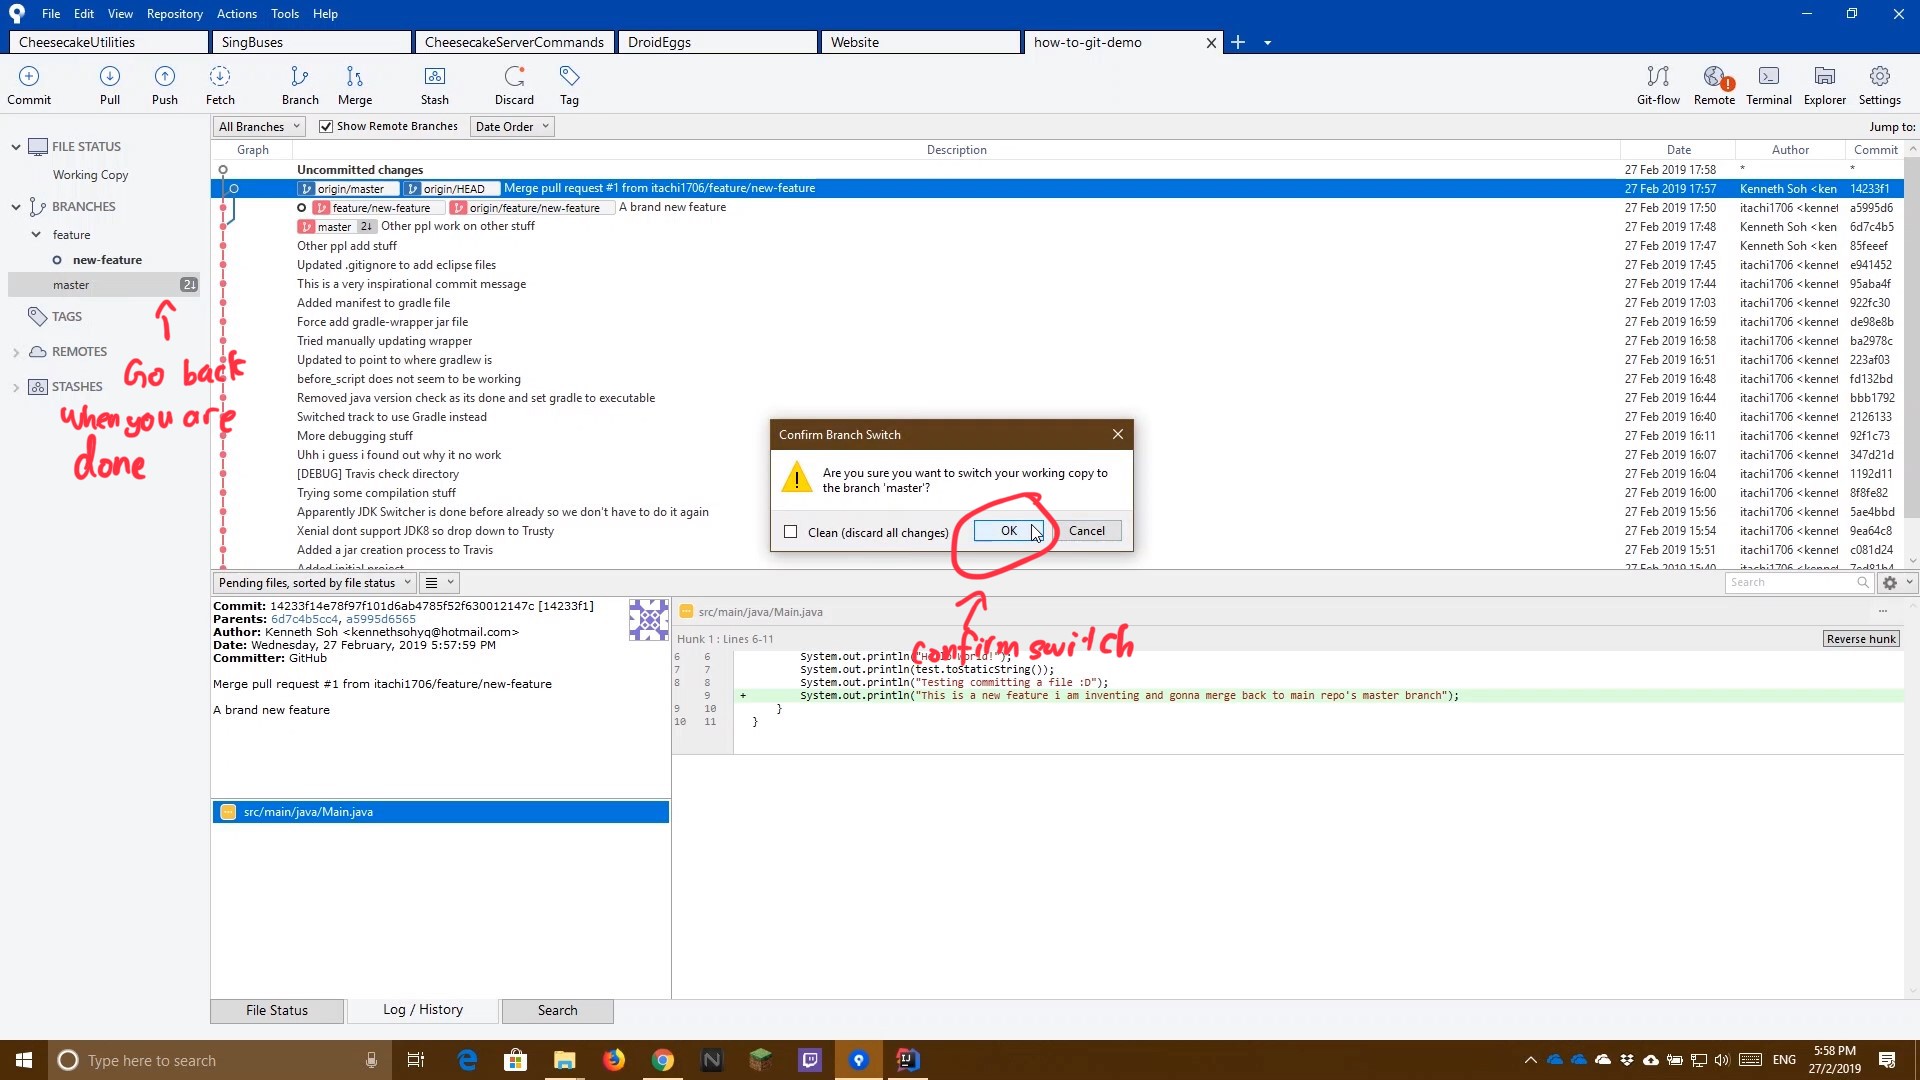
  13. When you are done you can switch back to the master branch (you may now delete the branch if you want, though its entirely optional)
    Issue Pull Request for Feature #6
Demo Video
The following is a video on how this is being done. Read the how-to guide before watching the video for actual steps to do it

Console Commands Used

      git checkout -b "branchname" # Checkouts a new branch
      git add [-A] "file" # Adds file to Commit
      git commit -m "Message" # Commits messages
      git push # Push commits to origin
      git checkout master # Go back to master
      git branch -d "branchname" # Deletes the branch